
It is easy to create a Blogspot blog and set up a new Blogger custom domain. Google technical notes are available for complete reference, but I realize that very few bloggers have applied the Blogger custom domain on their blog successfully.
Only 60% of bloggers are utilizing their domain, and the rest, 40%, are not aware of the full potential of a custom domain on Blogspot. Most of us have a habit of typing a domain name, including www. But for Blogger, www is not like a hosted website; it is CNAME (Canonical Name) on the Blogger. Then it is necessary to understand and take it carefully.
If you open a Blogger blog without including www and it is auto-redirecting to blog successfully, you are among 60%, and if not, then you are missing the full potential of a Blogspot custom domain. Because without typing www before the domain name, your blog will not open. It may show the page of your domain provider. It looks weird and doesn’t serve the purchase.
In this article, I will try to cover the following two objectives –
- Adding a Blogger Custom Domain to Blogspot blogs
- Resolve the unfixed issue of Naked Domain
If you want to add a custom domain to a Blogspot blog, then there are two essential things to consider, and you have to complete the following steps in the DNS Management Panel.
1. Creating CNAME
2. Adding A-Records
Steps to Add a Blogger Custom Domain
Suppose you do not want to shut down your blog while completing the steps. Please complete all steps given hereunder and then add the domain in Blogger setting.
Follow these steps to add a custom domain on Blogger blogs –
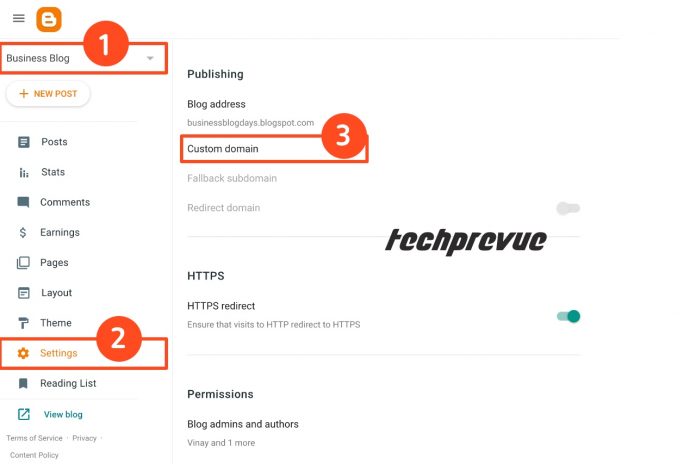
1. Log in to Blogger Dashboard and select a blog from the drop-down.
2. Click on Settings and scroll down to Publishing.
3. You can get an option to use a custom domain. Click on the Custom Domain.
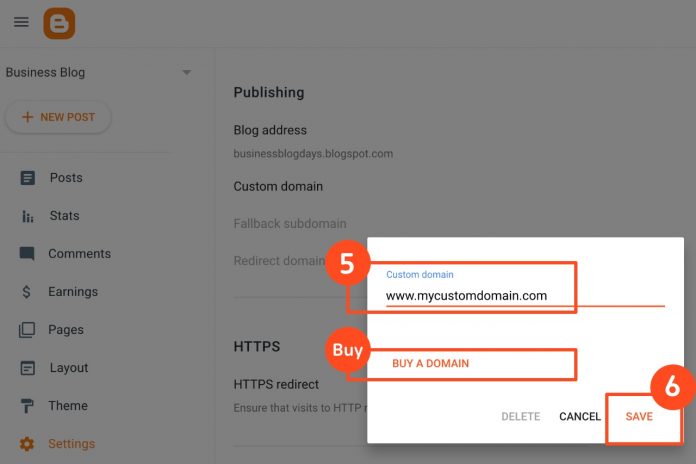
5. A pop-up will come up. There you get two options.
Add a custom domain
If you already have a custom domain name, enter that in the given field without “HTTP://” or “HTTPS://.” E.g. www.techprevue.com or blog.techprevue.com
Buy a Domain
How to get a domain name for a blog?
If you don’t have a custom domain, get an option to buy a domain from Google. Buy and add a custom domain for a blogspot blog.
6. Now, click on the Save button. You get two CNAMEs, as shown in the screenshot.
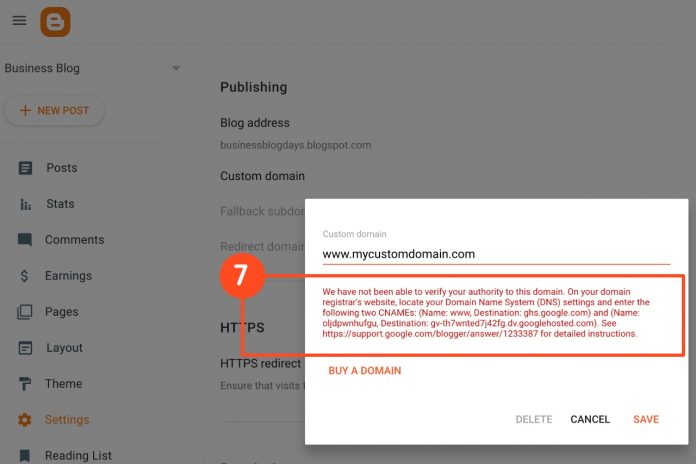
7. Log in to your domain panel to add these CNAMEs and A-Records.
Check who’s your domain provider. It may be Godaddy, Dynadot, BigRock, Namecheap, Porkbun, etc.
8. Domain panel has an option to manage DNS settings. Find it.
9. Add the two CNAMEs shown on the Blogger dashboard.
| Name, Label, Host | Destination, Target, Address, Points to |
|---|---|
| www | ghs.google.com |
| oljdpwnhufgu | gv-th7wnted7j42fg.dv.googlehosted.com |
Don’t copy these two entries. These are verification codes and different for every blog. Check your dashboard to get your CNAMEs.
10. Add these 4 A-Records, which are four different Google IPs.
| Name, Label, Host | Destination, Target, Address, Points to |
|---|---|
| @ | 216.239.32.21 |
| @ | 216.239.34.21 |
| @ | 216.239.36.21 |
| @ | 216.239.38.21 |
11. After complete DNS propagation. You can save the custom domain. Otherwise, you get the following error message.
Could not update settings. Try again
DNS propagation takes time. Sometimes, you’ve to wait for a maximum of 48 hours.
If you are getting Error 12 or Error 14, you should try adding the custom domain after a few more hours.
Read the troubleshooting article.
Still, you have trouble, please consult some technical person nearby you.
If you have more than one blog on the same domain, please do not click on all to redirect the naked domain to all blogs. Please choose only one of these.
How to Fix Naked Domain Redirect
A few bloggers only add two CNAMEs and forget to add four A-records. That’s why they lose 40% of blog traffic, and their blogs’ rank increase slowly.
Most blog visitors open any website without www, i.e., techprevue.com, and thus 40% of blogs do not redirect to www.techprevue.com automatically.
This is the main reason to fix the naked domain error on Blogger/Blogspot.
Steps to Fix Naked Domain Error
After completing all the above steps, wait for an hour or two and then add the Blogger custom domain to your blog.
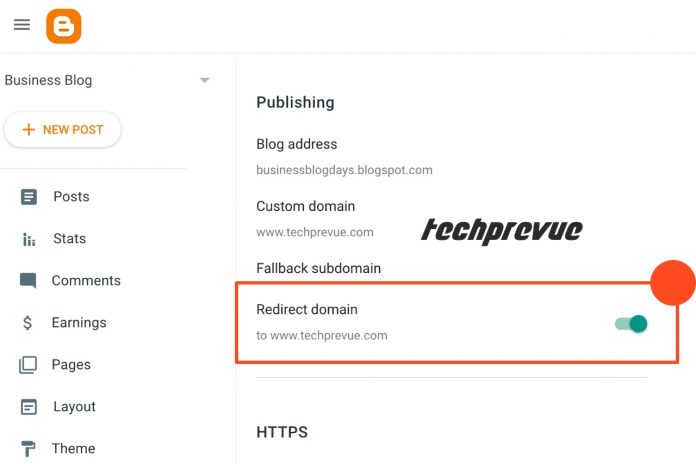
You have the option “Redirect domain.” Click on the grey toggle button to make it green.
In this way, you redirect your naked domain to the top-level domain, i.e., techprevue.com to www.techprevue.com.
Congrats, now you can set up a Blogger custom domain and fix the naked domain error.
Don’t forget to share the article with your friends.